Handloading start.
When you have all the tools needed and all equipment on your table its time to start the reloading process. The cases for your chosen cartridge are brand new or once fired in your gun.
Let us take a look at what happens when you fire a cartridge: The Primer when hit by the firing pin goes bang and it ignites the powder.
The powder starts to build up the pressure inside the case and the bullet starts the way to the target. The case under pressure expands and seals the way back to your face.
When the bullet exits the barrel and the pressure falls down again the case contracts a bit but not to the former stage. The cases metal is flexible but not to that point that it can go back like it was before. The expansion made it a bit bigger and the first step in the reloading is to resize it, transform it back so it can hold the bullet and enter the chamber without problems. I said first step but a visual inspection is always a must.
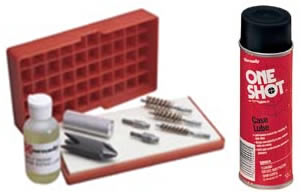
After we looked over the case and didn’t see any faults in and out of it we have to lubricate it otherwise it would get stuck in the resizing die. The resizing die sizes the case and takes out the spent primer. After that you need a new primer, gunpowder and to seat the bullet on top of it! Badoboom, badabaang and you empty case is now a readymade cartridge again.
Reloading for rifle.
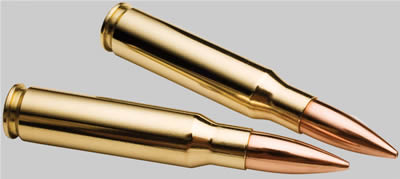
It differs a bit in reloading for rifle or handgun. Most of the handguns have straight walled cases; the rifle cartridges are more than often bottlenecked.
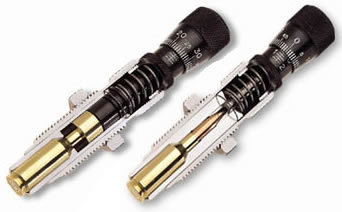
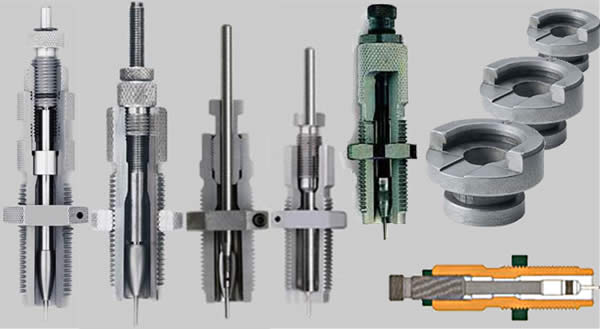
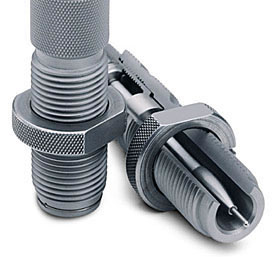
Resizing.
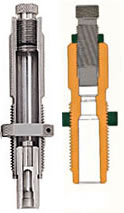
Ordinary reloading dies for the rifle cartridge consist of two dies; the resizing die is the one that does the most work. It resizes the case, takes out the spent primer and when the case is on its way out of the die, it resizes the inside of the case mouth.
The case, before it enters the resizing die must be cleaned and lubricated. The cleaning part is just a way to ensure you that nothing is in it. The lubricating will help the case in and out of the die without sticking to it. The extractor grove is the part of the case gripped by the shell holder that pulls out the case from the die, if not lubricated it risks to be destroyed and leave you with a case stuck in the die. We are to discus that in the troubleshooting after this part.
The case must be clean in and out otherwise the case may be harmed but worst, you may scratch the new die of yours. If the case is brand new, never fired take a look at it. Some of them are made late Friday evening by a worker that wants to go home to the wife and kids and puts less attention to those cases. I had a case without any way in hell for the primer to reach the powder inside the case J
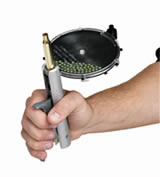
How you are going to lubricate the case? There are a few different tools for that.
Open the box with the dies in it, you got one of those with a shellholder in it good, otherwise you need one separately. When the pres is bolted to the table insert the shellholder
on the top of the ram and screw the resizing die on the top of the press.

Your instruction manual, and please, always read those however boring they can be) maybe says that you start with the die screwed down until it touches the shellholder when the ram is all the way up. Don’t do that! The first thing is to adjust the resizing die for the gun for which the cartridge is being reloaded for. The reloading dies may be a bit too short or to long for that particular gun of yours, technology is good but it can’t ensure you that the chamber of your gun, the cases and the resizing die will be of the same size. Almost but that’s not good enough, we want our cartridges to be alike or better than factory made ones.
To do this, screw the resizing die into the tool until it touches the shell holder when the holder is raised to its uppermost position. Back the die off about one half turn. The start a lubricated case in it as far as possible into the die. Remove the case and take a look at it, you would be able to see how far the resizing tool resized the neck of your cartridge. Turn your resizing die down in small increments until you can see the die resizes all the way down the case neck until it almost touches the case shoulder. If the cases are brand new or fired in a different gun, adjust the die the same way and test it on the gun chamber until it goes in and the bolt closes over the case with a bit of resistance. If the case was fired in a gun with a bigger chamber than yours then you probably will need the die to resize the shoulder of the case too. Avoid as much as possible to overwork the cases, minimum resizing is always better for longer case life.
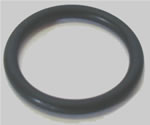
Did the die pushed out the spent primer? If not, adjust it accordingly. You want the spent primer to fall out when the case is in the uppermost position. Don’t forget to lightly lubricate the inside of the neck. Ordinary rifle dies resizes the neck more than needed and the decapping rod will expand the neck to the right inside diameter. Case walls differ, that’s why we need the neck to be of right diameter inside. When the resizing die is adjusted properly lock it down. Whatever die maker you choose the products from let me give you some advise.. Your reloading press is probably cast, the ram my or not may be in the centre of the press and inline to the die when its screwed on the press. The dies of yours may be a bit of centre and that can happen to the shellholder as well. And if everything is inline then maybe you disturb the peace when you screw down the nut and lock the die on the press. You see? Lots of tools and if only one of them is a bit of centre then its going to show up on the cases you resize. What to do about it? Use my method to ensure concentrity. Let the case itself do the inline thingie J To do that you have to let the resizing die move a bit so the case can center it better. Before you screw down the die put a O-ring on the body of it under the lock nut. Some dies of Lee have that already, if not you can put it on all dies of yours. When the die is screwed down and you lock the ring against the O-ring you still have a bit of play and that is used by the case to inline it better. Make a mark on your press and the lock nut with a pen so you can put back the same way next time you need that die.
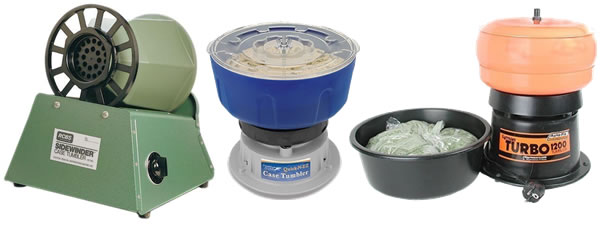
Now that your resizing tool is adjusted the best way it can be, run all the rest of yours cases through it. All the cases resized, its time to move to the next step. A bit of cleaning is need now. You have dirty cases from the start then its best to clean them before resizing but clean cases, after the resizing need a bit of cleaning care too. The spent primer left a bit of residue inside the primer pocket and the lube you used in the resizing must be cleaned away.
If you have the tools you can clean all the cases at once, other wise you do it one by one.
With a clean and inspected case we are now ready for priming the case. Stay awy from the press priming arms and tools, with those you cannot get the feel for the primer when its inserted right. Use one of the bench or handheld tools to prime them with the primer recommended by yours loadtable.
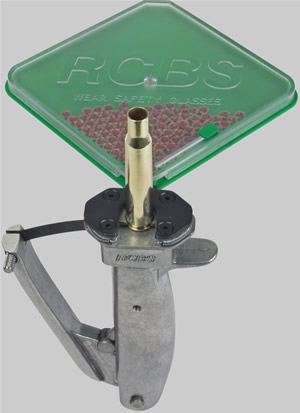
The prime should sit firmly in the primer pocket and be just below the surface of the case head.
Pic på primer in case
Powder charging
Next step is to charge the case with powder. The amount and type of it is on the loadables you have in front of you all the time when reloading that cartridge/load combination. Only one canister of powder on your table at a time, same goes for primers and bullets too. You can charge one case at a time after weighting each charge on the powder scale and use a powder funnel to get it in or adjust a powder measure to charge the cases faster. Whatever you use put some care in it. We don’t want some cases to get too little and others to much of it J
.jpg)
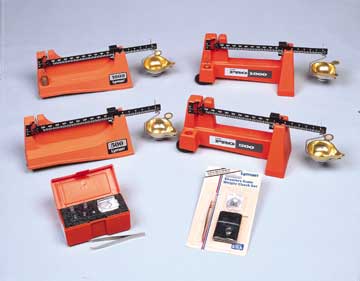
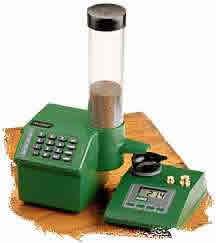
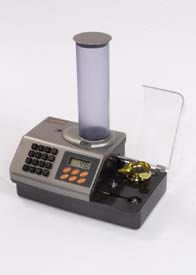
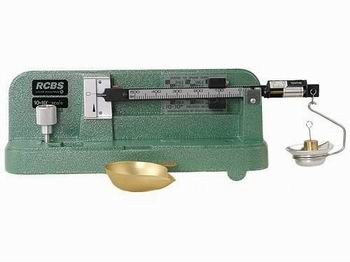
Your powder scale can be a weight balanced scale or a digital one. Whatever you use, read the manuals carefully and remember that the scale is a instrument more than a tool. Be nice to it and learn how to use it, you need to trust it with your life or at least a few body parts J
When all cases are charged inspect them. Does the amount of powder seem the same in all of them? Remember to visual inspect control and double chuck everything you do.
With all cases charged lets move to the next step.
Bullet Seating
The die nr two is the bullet seater. The body of the die holds the case and the actuall bullet seater inside pushes the bullet down in the case neck. Some of the bullet seaters are free floating some of them are screwed in place.
Put a sized empty and non primed case in the shellholder and up with the ram to the uppermost position.
Screw the die down until it touches the case. We wont crimp the case mouth around the bullet for now so let it just touch the case lightly and then lock it down with the locknut who is already prepared with an o-ring as we discussed earlier. Unscrew the adjusting top of the bullet steam all the way up. Insert a bullet on top of the case and push it up again. Now, slowly lower the adjusting end of the bullet seater until it pushes on the bullet. Lower the ram adjust the bullet stem down a bit and test again. A god set of callipers is a must, digital or not, learn to use them right and measure the length of the cartridge. That’s on your loadtable too, let’s follow that, further experiment is done when one knows exactly how to do it.
When the die is adjusted you have an empty case except for the bullet in it. Save that for reference and please remember to mark it accordingly. Next time it’s an easy task to adjust your die against that case and bullet length.
Now run all your charged and primed cases with the bullet on them in to the die and seat the bullets. You have now completed the reloading process….Almost J
What you need now is to write down everything concerned with that cartridge and particular load so you know for future reference.
After you test those cartridges, write down some more, how do they felt? Printing on target? How did the cases look afterwards? One cannot have too many notes, it’s a big help in future reloading development.
![]()